Building Your Own Hi Lo Metal Lathe
This website is a work in progress as we tackle each stage of building the Hi Lo Metal Lathe ... Please join us in this project ... additional content is added as the project progresses
The process of building a metal lathe from scratch gives a sense of pride and accomplishment, transforming raw materials into a finely tuned machine ... it can be a very fulfilling and rewarding project ...
Building a metal lathe from scratch allows for a deeper understanding of its mechanics and a personal touch that factory-made machines lack.
Crafting such a machine can be a rewarding journey, as it fosters skills in design, machining and problem-solving.
Furthermore, a custom lathe can be tailored to specific needs, allowing for unique features that enhance functionality.
The process of building also instills a sense of pride and accomplishment, transforming raw materials into a finely-tuned machine.
Ultimately, for those passionate about metalworking, constructing a lathe can be as fulfilling as the projects it will inspire.
The metal lathe is the prince of machine tools ...
The father of all other machines and the industrial revolution.
What an amazing machine, capable of building nearly every other machine.
Have you ever wanted to build your own metal lathe and feel the excitement of the first chips flying off the workpiece on a machine that you have created yourself from readily available ‘bits and pieces’ of steel ?
I have always wanted to do that, ever since I first touched a lathe in my high school metalwork class. Life has gone by without the need for a lathe, however, that yearning has remained with me all this time. So now, in my later years, I am doing just that … building my own metal lathe from scratch, avoiding any outside machining where possible, and relying on my own basic metalworking skills … it may not have all the ‘bells and whistles’ of a factory lathe, but then again, later down the track, with some modern electronics, it could be made to have whatever you wanted …
I have good hand skills, an angle grinder, a drill press, an arc welder, and a good amount of design and drawing skills. Surely, I can build a lathe and derive great satisfaction along the way. The journey is the goal, rather than the actual need to have a lathe with all the capabilities right now.


Perhaps you have a similar interest and desire ? If so, then let’s get to work and build ourselves a capable machine, and find enjoyment and satisfaction every step of the way …
Why the ‘Hi Lo’ name ?
I needed an interesting name for the project, and Hi Lo could mean many things … High precision, Low effort, High satisfaction, Low cost, High quality parts, Low vibration, High design standard, Low disappointment (not buying a ‘cheapie’ lathe), High learning, Low hurry (the project is the journey) … let’s just hope that it’s not High cost and Low precision 😊 But let’s be honest … if you need or want a super precision lathe that does everything, and you want it soon, then you had better get yourself down to the machinery dealer and/or scour the second-hand ads … if you want a challenge to satisfy your inner engineer, then building your own Hi Lo Metal Lathe may be just the project for you …
More to the Story
In my early twenties, I bought a 6”/150mm four-jaw chuck and a #2 Morse tapered sleeve in readiness for some future lathe fabrication. I’m now in my sixties, and would you believe it, I just recently mounted that chuck to a spindle and did my first turning with it. Those first chips were very exciting, and already I was learning a lot about the cutting edge versus the material … oh, what fun … all on a wood lathe, mind you …
A wood lathe, you say ? ... Some months back, I saw a wood lathe with a reasonably looking cast-iron bed, advertised locally for $200.
Interested in joining the Journey ?
Then click around the pages on this website.
I am documenting the design and building process on this website and also on YouTube. I will post videos on YouTube, create detailed CAD drawings, and discuss the reasoning behind the design of each part.
You can also read the ‘Lathe Design’ pages to get a further understanding of the project. A ‘Lathe Design Notes’ PDF is available for FREE download on those pages.
You can submit your email address below to get notified when additional articles are posted here and on YouTube.
… Thank you for your interest and support …


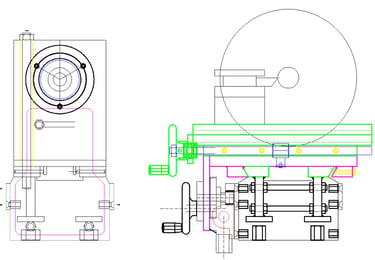

A while back, I entertained the thought of popping down to my local machinery dealer and purchasing a small bench lathe for around $4,000+, including some cutting tools, etc. Simple, put down the money and install the lathe on the bench in my shed … easy. But the idea of that just didn’t sit right in my mind. I didn’t really want to fork out a large lump sum of money, and furthermore, what projects did I actually have that required a lathe ? … none. I then realised that ‘building from nothing’ was what I was interested in. The future projects would be actually building more parts for the lathe itself. Ah yes, that magic machine that, at some early point, starts to build the parts for itself … yes, that was what I had always yearned for …


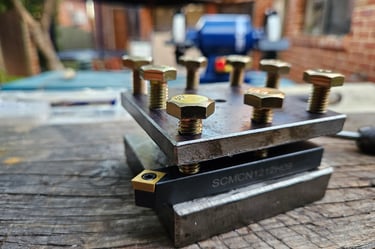
My thoughts were, I bet I could mount that long-held four-jaw chuck, purchase a $240 eBay X-Y table to bolt onto that cast iron bed, and as my first real project, fabricate a 4-way tool holder. I did that, and it all worked amazingly well. I actually turned the backing plate to mount the four-jaw chuck onto the wood lathe spindle using that setup. I then mounted the chuck and proceeded to turn a few more pieces of steel and aluminium for fun.
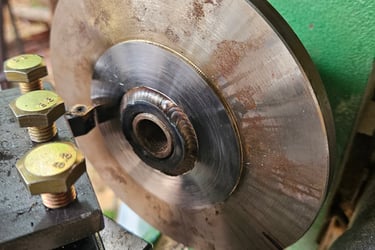

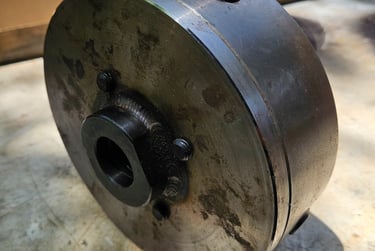


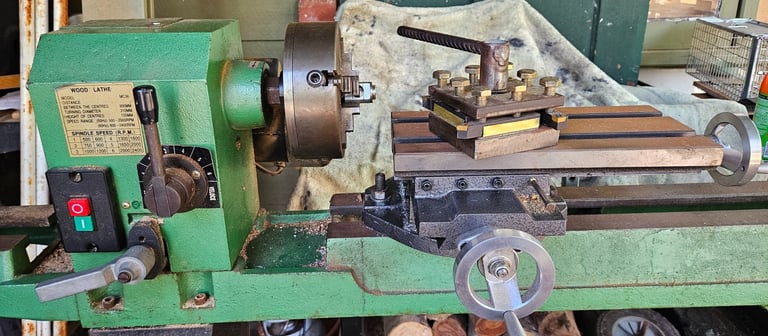

I even made an aluminium adapter to mount a diamond wheel to an old motor. I now have a fun and useful machine for just $440.
The ‘wood lathe setup’ is as shown below.
The X-Y table is aligned with and bolted to the ways using two fabricated tee-nuts. The homemade 4-way tool holder also uses fabricated tee-nuts so that it can be fixed to the table’s tee-slots.
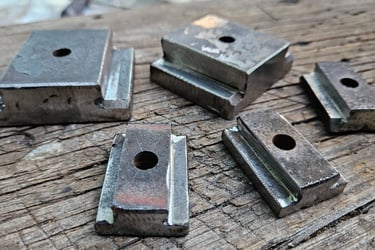

The Plan …
The plan is to use the ‘wood lathe setup’ to machine the Spindle and a few associated parts, rather than having a machine shop do that work. At some early point in the project, I can use the lathe itself to machine further parts … the machine that builds itself !
Many of the parts will be laser-cut, some from 20mm plate and others from 12mm plate. These two thicknesses were found to cover most requirements and also save a great deal of cutting and grinding with the angle grinder, not to mention a superior finish.
Initial parts that require machining will be designed in such a way that there is minimal material to be removed. These tasks can be completed on the ‘wood lathe setup’ using light cuts only.
When I am finished with the X-Y table, it will be put to good use on the drill press and/or used for lathe milling, so it’s just a bonus to have that X-Y table on hand. The purchase of the X-Y table has already given me lessons regarding gib strips and slide adjustments (read ‘Made in China’).
The wood lathe can be sold when it is no longer required, however, you could keep it and have some fun turning some wood bowls.




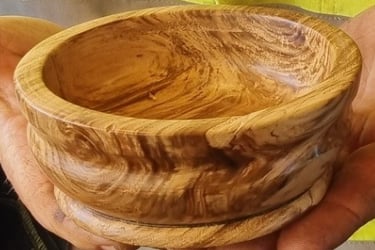

If you won’t have such a setup, then you could do some alternative setup. In conjunction with a purchased X-Y table, you could fabricate a temporary spindle in self-aligning bearings, mount a chuck, and bolt the lot down to some sort of base. You won’t need much lathe capacity to get the project moving along.
Failing having your own temporary lathe setup, you could have the initial parts sent out to a machine shop or call on a friend with a lathe.
The success of that setup has inspired me to go ahead with designing and building my homemade Hi Lo Metal Lathe.
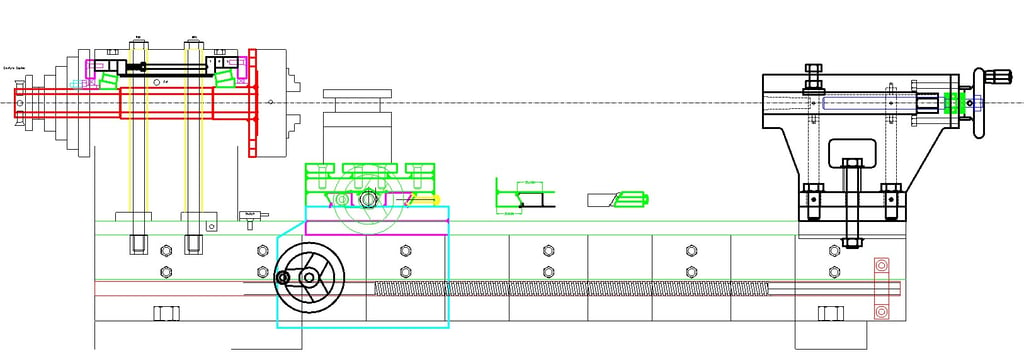

Hi Lo Metal Lathe
Build your own metal lathe
Enquiries
info@hilometallathe.com
© 2024. All rights reserved.
